Hello Digital Nomads, and welcome to this tutorial! Here I’m going to teach you how to build a website for free step by step!
Step 1: Sign Up for free Hosting
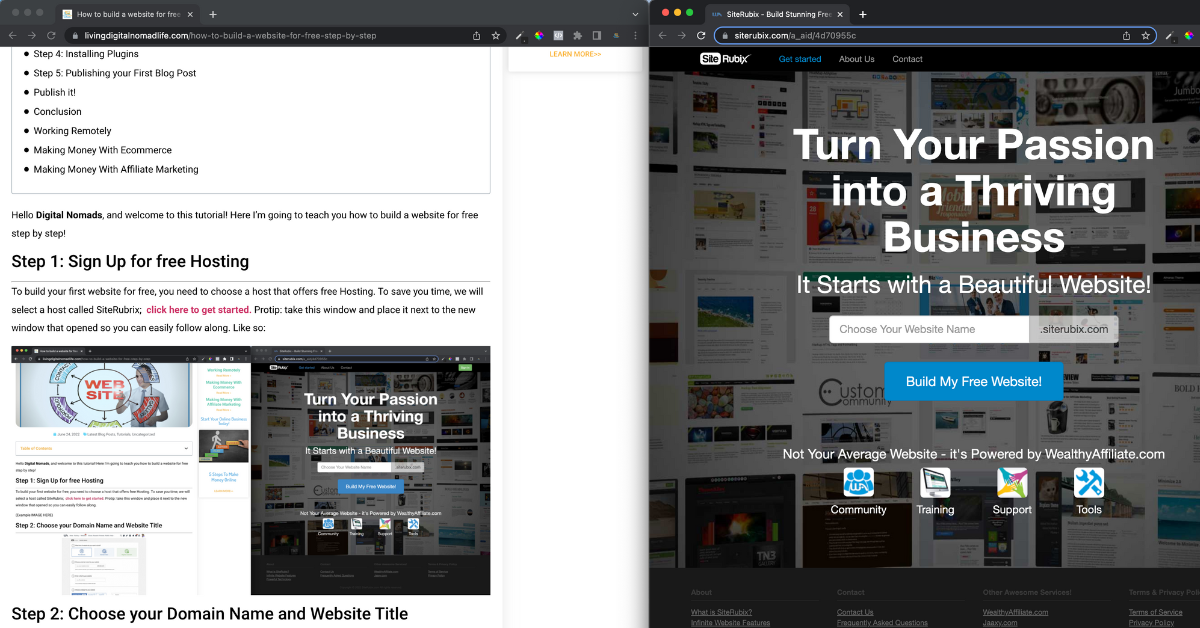
To build your first website for free, you need to choose a host that offers free Hosting. To save you time, we will select a host called SiteRubrix; click here to get started. Protip: take this window and place it next to the new window that opened so you can easily follow along. Like so:
Step 2: Choose your Domain Name and Website Title
After signing up, it’s time to choose a domain name. Click on “Free Domain.” You can select anything you want but don’t spend more than a few minutes thinking about it. You can also use Jaaxy to help you choose a good SEO domain name if that’s what you’re after. However, don’t get too hung up on the Domain Name, you can always change it later, and I will be showing you how to do that. I encourage you to come up with something that reflects what your website is about.
Your Website Title
The site title can be anything; you can change it anytime, so don’t spend too much time on it now. I just use my domain name (living digital nomad life in my case) and then change it once my new site is ready to be published.
Step 3: Choosing Your Theme
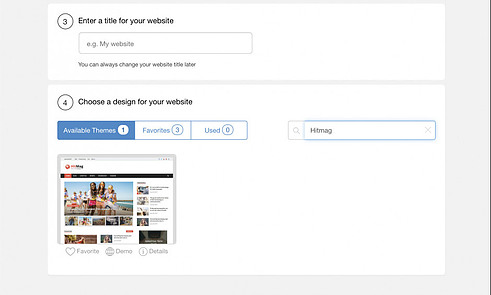
Now that you’ve chosen a domain name and a site title, it’s time to choose a theme. I personally recommend the “Hitmag” theme. You can find it easily by copying Hitmag and pasting it into the search bar. You can choose any theme you like, BUT this theme has everything you need to rank your content and establish your web presence. At this stage, the way your website looks is NOT your first priority. If you intend to start making money as soon as possible, ALWAYS focus on content first.
Step 4: Installing Plugins
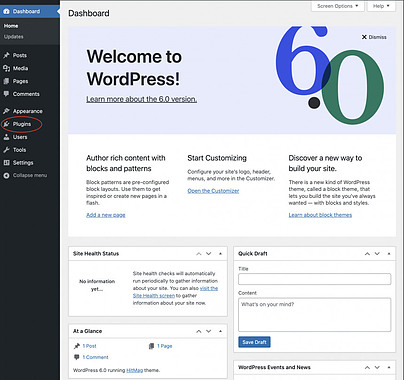
From your Dashboard, it’s now time to install some useful plugins. In the menu on the left, look for “plugins” and click on it. I recommend that you only use Kraken Image Optimizer and The SEO Framework for now. We will install more as your website begins to grow. However, it’s important to note that plugins use resources which will slow your website down if you have too many installed. If your web pages load too slowly, it can harm your website’s SEO.
Step 5: Publishing your First Blog Post
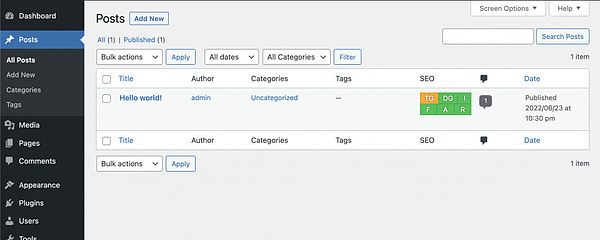
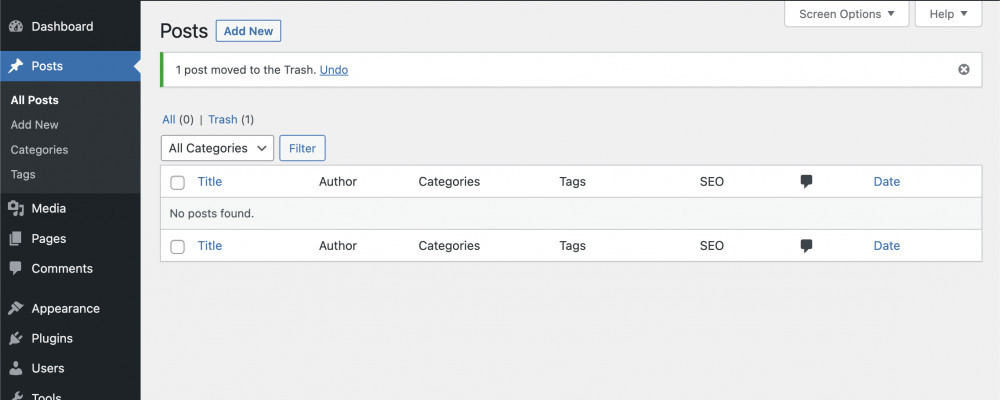
Now that we have your plugins installed, it’s time to write and publish your first blog post! In the left-hand menu, you should see “Posts.” When you click on “posts,” you will see that a post has already been generated for you. Let’s delete that post by moving your mouse over it. Next, you should see a menu option titled “Trash.” Click on it, and it should disappear.
To start a new blog post in WordPress, click “Add New” at the top of the page. This blank page is where the magic happens. Every website you know and love started with a blank page just like this, staring back at its creators. Now that blank page is staring at you, bursting at the seams with enormous potential. Now it’s time to make YOUR mark, share YOUR thoughts and gain the ability to build the life of your dreams. What should you write about? That’s up to you, but ALL great websites start with an “About” page. Your about page can be anything; it can explain who you are and why you built this website. It can even just be about the purpose of the website itself. If you need some inspiration, check out my about me page here.
Pro Tip: Don’t get hung up on writing. It doesn’t have to be perfect. It just has to be there. Just get your thoughts down and clean it up later. We are building a solid foundation for you to launch your website and grow your income. You don’t have to be a “great writer.” Writing is a skill, and you will get better as you practice.
Publish it!
So you finished writing? Good! Now it’s time to publish. When you press publish, you release your content into cyberspace, to be scooped up and indexed by our search engine overlords. Don’t worry; once you publish something, you can always go back and edit it. It takes time for google to crawl your website and determine how to rank your content. How long does it take for google to index your blog post? It depends on a lot of factors. Because your website is brand new, it may take a bit longer compared to websites that are months or years old. As you post more content, Google will reward you for it by ranking your website above those with less activity, so what are you waiting for? Get posting!
Conclusion
Congratulations! You now have your website hosted for free. You chose a domain name and a theme. You also installed useful plugins and published your first post! Now you have the beginnings of a fantastic website! A powerful and valuable piece of digital real estate! Now you might be thinking: How do I make my website different from other websites that use this same theme?” Don’t worry about the design for now. The content you write on your website is more important than how your website looks now. The more content you have, the more Google will begin to trust your website and gain authority. As your website gains authority, it will become easier for you to rank your content. The faster your content is delivered on google, the quicker you can start making money.
If you haven’t reached out to me on WA yet, I highly recommend you do so ASAP. I can personally help you to grow your website and make this process easier for you. I also offer additional bonuses for those who want to take their earning potential to the next level.
Stay tuned for Part Two: How to make new pages, create a menu, edit your site theme, and add a site logo. Sign up for my newsletter to be the first to know when it’s released!
